Sunday, August 15, 2010

Yards and Yards Original: Secretary Insert How-To

Do you remember THIS great secretary makeover?


Well, I've had a few emails about it and I thought I'd go ahead and answer the question, "How did I make the secretary fabric inserts?" It was really difficult, let me tell ya.

So, here you go:

Supplies:

1 Secretary, hutch, bookshelf, etc.
Foam board (I got mine at Dollar Tree)
Fabric
Tape

Step 1. Measure the openings in the shelves you want to cover. Here's a before shot so you can see why it was so much fun to cover this baby.

Step 2: Cut your foam board to fit your measured openings. Try them out to see if they fit.

Step 3: Cut your fabric leaving about an inch extra on each side.

Step 4: Wrap the foam board with your fabric and tape it in place. Highly technical... I know.


Step 5: Now you have your covered foam boards. Go ahead and stick them in the openings.


Step 6: Enjoy! And you can change it any time you want to!


PS. Linking up to some awesome parties!!!

The Girl CreativeThe DIY Show OffKeeping It Simplemmm buttonSumo Sweet StuffAll Thingz Related The Trendy TreehouseNightOwlCrafting http://www.thethriftyhome.comMake it Yours @ My Backyard EdenGet your craft on Thurs.giveawaysHookingupwithHoH

Friday, August 13, 2010

Favorite Peek of the Week: Antiquity by Michael Miller


This is such a pretty line! Michael Miller gets a perfect 10 on this one! I'm lovin' how different this is. It's rich and beautiful. And that's why it's my favorite peek of this week! Enjoy.

Thursday, August 12, 2010

Stop the Presses! Parisville Revealed...

After much teasing and taunting... ok, maybe not taunting... Tula Pink has just revealed her Parisville Collection. Three gorgeous colorways. Eeeny. Meeny. Miney. Mo. Which colorway is your cup o' joe? I couldn't help myself.


Inspire Me Thursday: Daisy Crazy

My husband is a wise man. He mentioned once how everything in nature seems to match. For some reason all of God's beautiful creations match. It's not the same with the clothes we make, or the colors we sew with, but it nature, it all goes perfectly together. I like to think about that.

So, today's inspiration is brought to you by nature. And since I love daisy's, here you go:


1. Robert Kaufman: Mingle
2. Alice Kennedy: Sunny Daze
3. Anna Maria Horner: Good Folks
4. Lizzie House: Castle Peeps
5. Patty Young: Flora and Fauna
6. Heather Bailey: Nicey Jane
7. Sandi Henderson: Meadowsweet
8. Anna Maria Horner: Good Folks

So bright. So summer. So nature. So inspired!

And... the swatch images were brought to you today from Hawthorne Threads. I LOVE their site. You can get any of these fabrics over there... (And no, I'm not paid to say that. They just have a rockin' site)

Wednesday, August 11, 2010

We Sew Wednesday: Just Another Hang Up

Now, I have to tell you... I do NOT know Suzanne over at the Just Another Hung Up blog, but I am sure we are kindred spirits. You know how you stalk... I mean... occasionally visit someone's blog and you can just tell that you'd get along with them. Yep. That's me and Suzanne.

Her blog is, as I mentioned, Just Another Hang Up. I visit all the time to see her inspiring ideas and check out her new creations. I love what she does! Check out a few of these photos from her site:

There's a tutorial to make this lovely pillow:


And what about this bag? I'm in love!


So many great ideas!


So stop in and get inspired. Meet a fellow crafter and send some love. You will always leave with a new idea or a desire to jump in and try something new.

Tuesday, August 10, 2010

Sew In the Know Tuesday: Ruffles and More!

Welcome to the 2nd Edition of Sew in the Know Tuesday! I have some really fun finds to share this week.

Michael Miller is releasing Ruffles. Raw edge and already gathered. What a time saver!


And, there is even a tutorial! So pretty.


Next, Riley Blake is selling sippers by the yard. I have to tell you I was a little dubious when I heard this one, but they are so much fun!

via Riley Blake Designs

Look at these beautiful things! I can just see these on a handbag or in hair. I'm in love.

And now, here are the up and coming fabrics...

P&B Textiles has a beautiful new line out called Nellie. It has a wonderful vintage feel with flowers and polka dots... a perfect combo! It is arriving in shops now. Check it out:


Here is another collection from Clothworks called Avalon. I love the color combinations in this line. The bold flowers, the birds, the mod style... this is a winner in my book.

via Clothworks

Hope you feel like you are sew in the know. What are you most looking forward to?

Sunday, August 8, 2010

Yards and Yards Original: Ruffled Table Runner


Well, here we go... another tutorial! I saw something similar to this and I can't for the life of me remember where. Sorry. The one I saw had lots of different fabrics and I wanted to try it with a simple linen fabric. I liked the final product enough to share. So, here you go.

STEP 1: Get your materials

fabric (I used 2 yards of linen)
batting or felt: 14x36 (I love felt instead of batting for table runners, but batting is fine too)
sewing machine

STEP 2: Cut your fabric

Depending on your size, you need to cut 2 pieces for the top and bottom of the runner and cut 1 of the felt/batting. My runner is 14 x 36.

Next, I cut my ruffle pieces. These strips are 4" x Twice the width of your runner. Mine were 4"x28". I cut 14 strips, but if your runner is much longer, you will need more.


STEP 3: Make your ruffles.

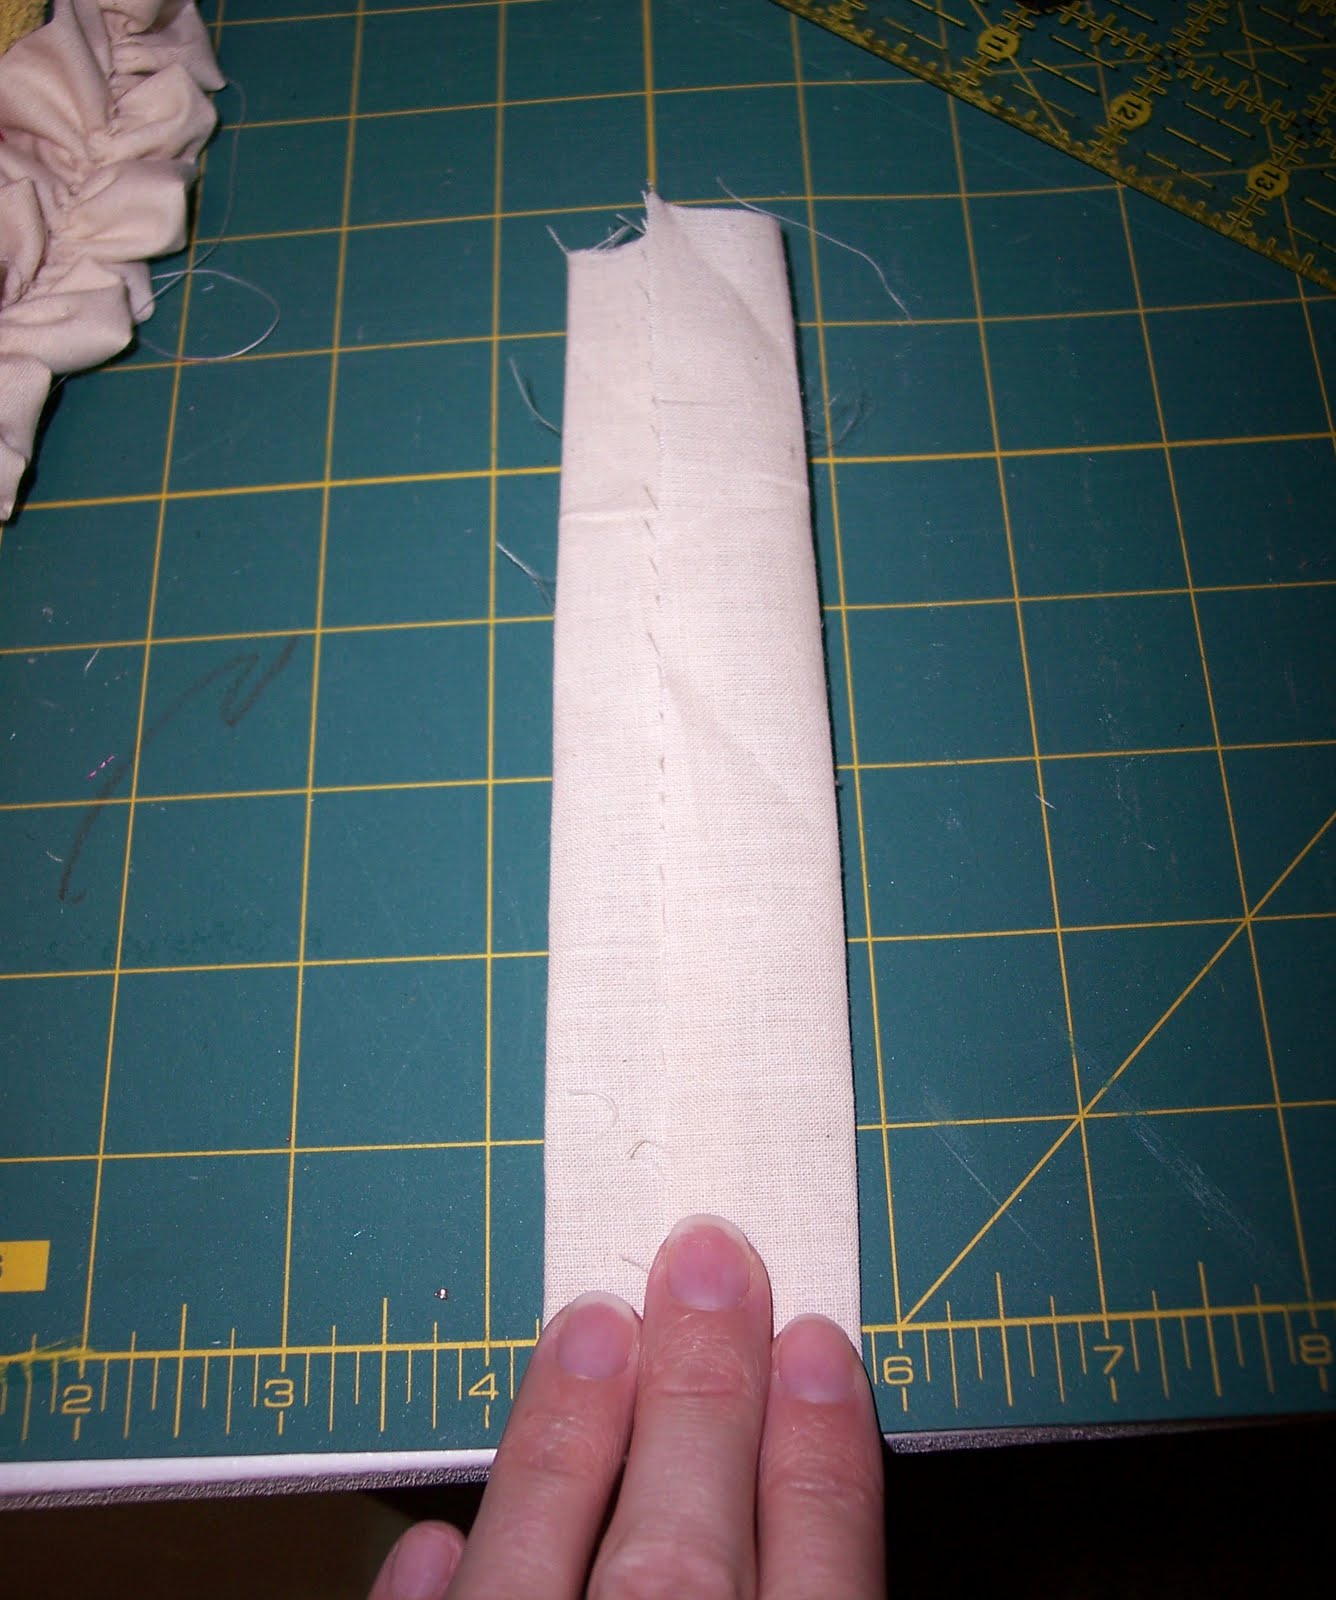
Take one ruffle strip. Fold one edge in a little past the center. Then fold the other side in so it just overlaps the first side. Essentially, you are folding these into thirds. Here are some pictures:


Now sew down the center using the longest stitch your machine will do. Make sure to go through all 3 layers!

Pull one thread on the end of your strip and gather the fabric. It doesn't have to be the perfect length.


STEP 4: Mark you runner top.

Layer your top, batting, and bottom as they will be when finished. Now mark the center of your runner on both edges of the runner. Make marks every 2.25". I used alternating colors of pen so that I'd know which marks went together. The marks will end up under the binding so don't worry about them.


STEP 5: Attach ruffles.

Carefully pin all of your ruffles onto your runner, going through all 3 layers of the runner.

Sew along the center of each ruffle.

Step 6: Add your binding.

You can do the binding any way you want to. This is how I did this runner:

Make a binding by sewing together enough 3" strips of fabric to go all the way around your runner. Iron the strip in half. Then fold each side in toward the center line and iron.

Folding the bias tape around the edges, pin it in place.

Zig-zag stitch around the binding, making sure to go through all the layers.


Enjoy!!! It's a simple, classy table runner.

PS. Linking up to some awesome parties...
The Girl CreativeThe DIY Show OffKeeping It SimplePhotobucketNightOwlCrafting http://www.thethriftyhome.comMake it Yours @ My Backyard EdenGet your craft on Thurs.giveawaysSimply DesigningFavorite%2BThings%2BFridaybig%2Bbutton.jpg

Chic on a Shoestring Decorating