
After much trial and error I am pleased to share this tutorial with you. I learned a bit
HERE and then I just ran with it.
So, here goes nothin...
Supplies:
Fabric - cotton works but it's tricky. I'd stick with satin, taffeta, tulle, etc. You'll be "melting" them, so you want that plasticky component in the fabric.
Candle
Flower centers - I used buttons, beads, gems... whatever you like
Hot glue gun
Needle and thread
Felt
Olfa circle cutter (optional)
This is the Olfa cutter. I don't know if it;s too much faster, but it sure makes nice circles. If you are mass producing, this is nice to have around.

Or.... I traced circles with my daughter's lovely stacking cups. I made 9 circles for most of these. The biggest is about 3.5 " and the smallest is about 1" across.

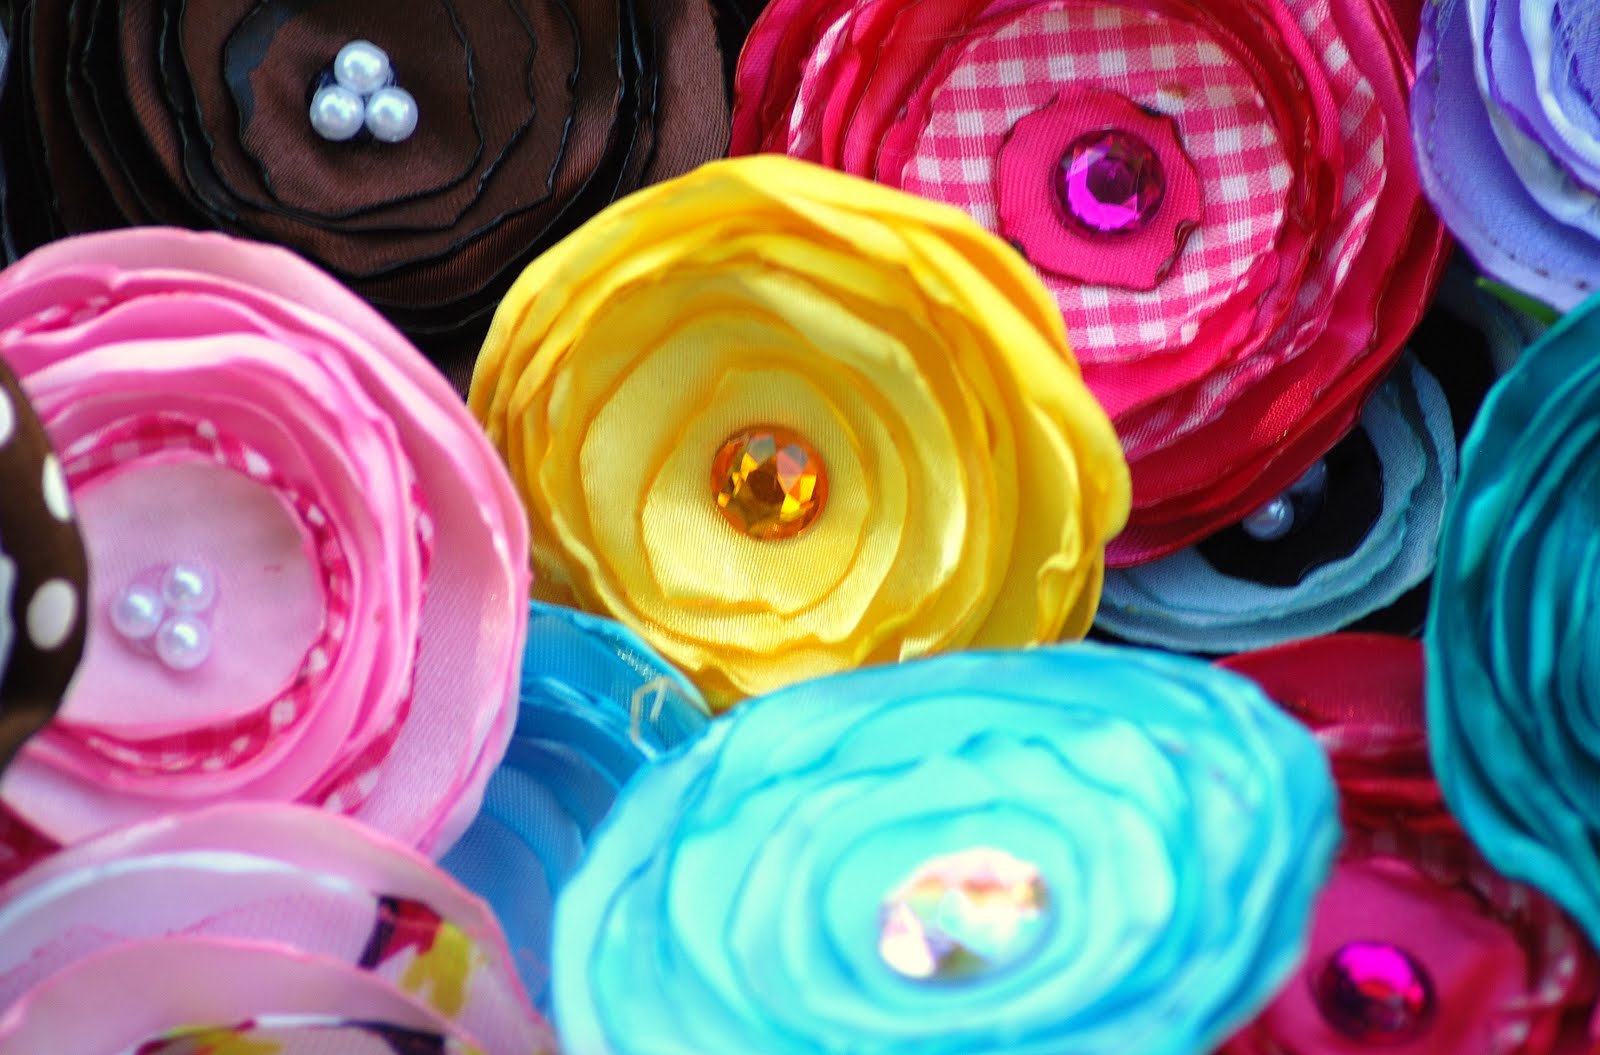
Here are the circles cut out and pinned together. I think I've decided I like plain old satin the best. I tried layering and alternating, but my favorites are one color and one fabric. Go figure.

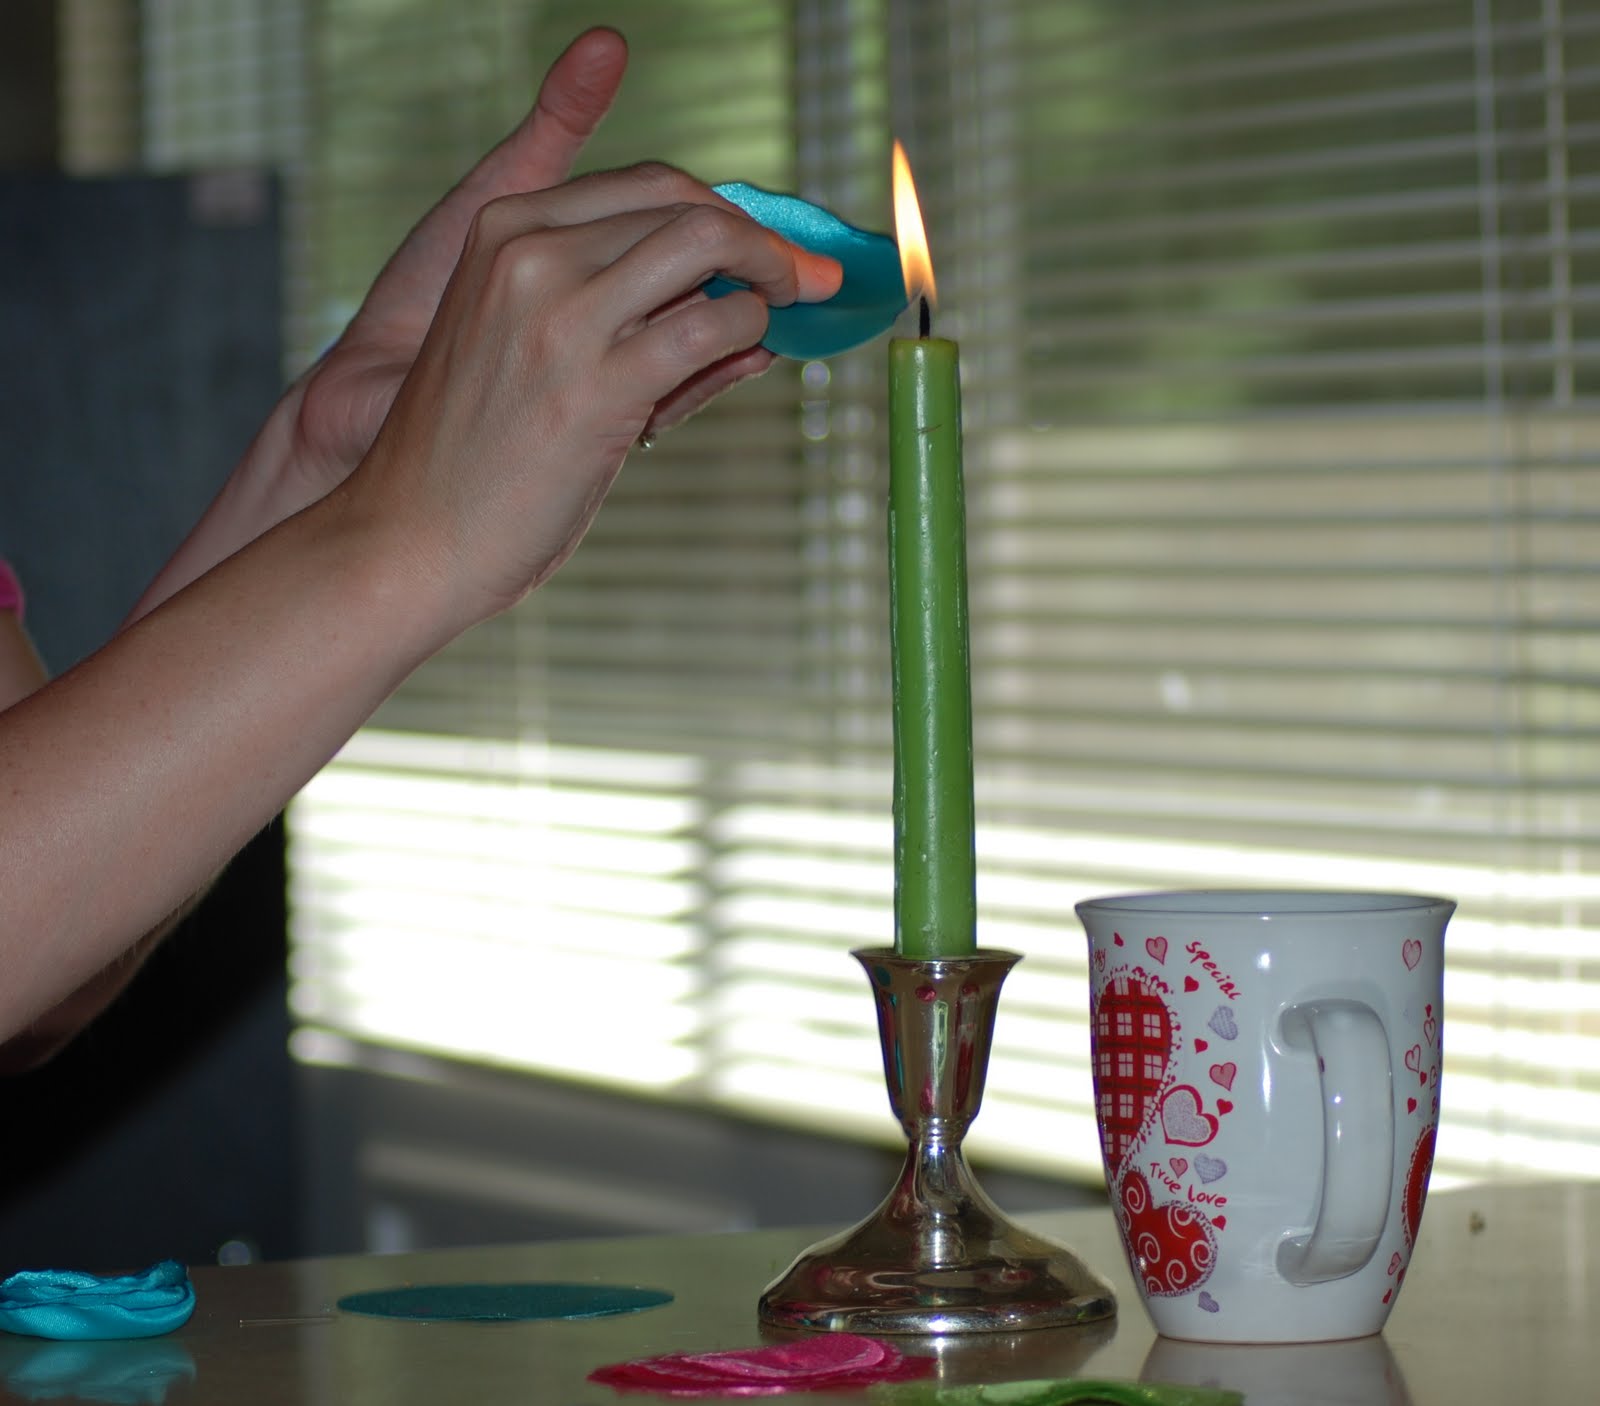
Next, you need to burn each piece individually. You need an open flame that's easy to reach. My 7 year old took this pic... I couldn't really do it while handling the flame.
Just burn around the edges. You will want to experiment with this. Some fabrics burn before they hit the flame. Others take some convincing. I even like some of the edges getting a bit black. It adds dimension. I really like when the edges curl up a lot. It looks more like real flower petals. Try angling your circles toward you for that effect.
Oh... and water nearby is a must.

Now, stack them back up and sew them together. I go in and out about 4 times then tie a few good knots to be safe.

Now, you need to make my magic felt backing. I cut a circle about 1.5" across. Next I cut a strip .75" wide by 2" long. Sew it to the center of the circle along each side of the felt, as shown below.
I did most of them the same color, but I wanted you to see how the 2 felt pieces go together.

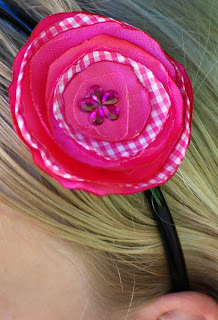
When you are done, hot glue these lovelies to the backs of the centers of your flowers. Add your desired flower center and voila!! Awesome hair bows.
You can thread small headbands through the felt pocket, or you can attach them with an alligator clip. Super versatile and super cute!


OK. Maybe I got a little carried away. Enjoy!

PS. Linking Up...


