

Well, here we go... another tutorial! I saw something similar to this and I can't for the life of me remember where. Sorry. The one I saw had lots of different fabrics and I wanted to try it with a simple linen fabric. I liked the final product enough to share. So, here you go.
STEP 1: Get your materials
fabric (I used 2 yards of linen)
batting or felt: 14x36 (I love felt instead of batting for table runners, but batting is fine too)
sewing machine
STEP 2: Cut your fabric
Depending on your size, you need to cut 2 pieces for the top and bottom of the runner and cut 1 of the felt/batting. My runner is 14 x 36.
Next, I cut my ruffle pieces. These strips are 4" x Twice the width of your runner. Mine were 4"x28". I cut 14 strips, but if your runner is much longer, you will need more.
STEP 3: Make your ruffles.
Take one ruffle strip. Fold one edge in a little past the center. Then fold the other side in so it just overlaps the first side. Essentially, you are folding these into thirds. Here are some pictures:

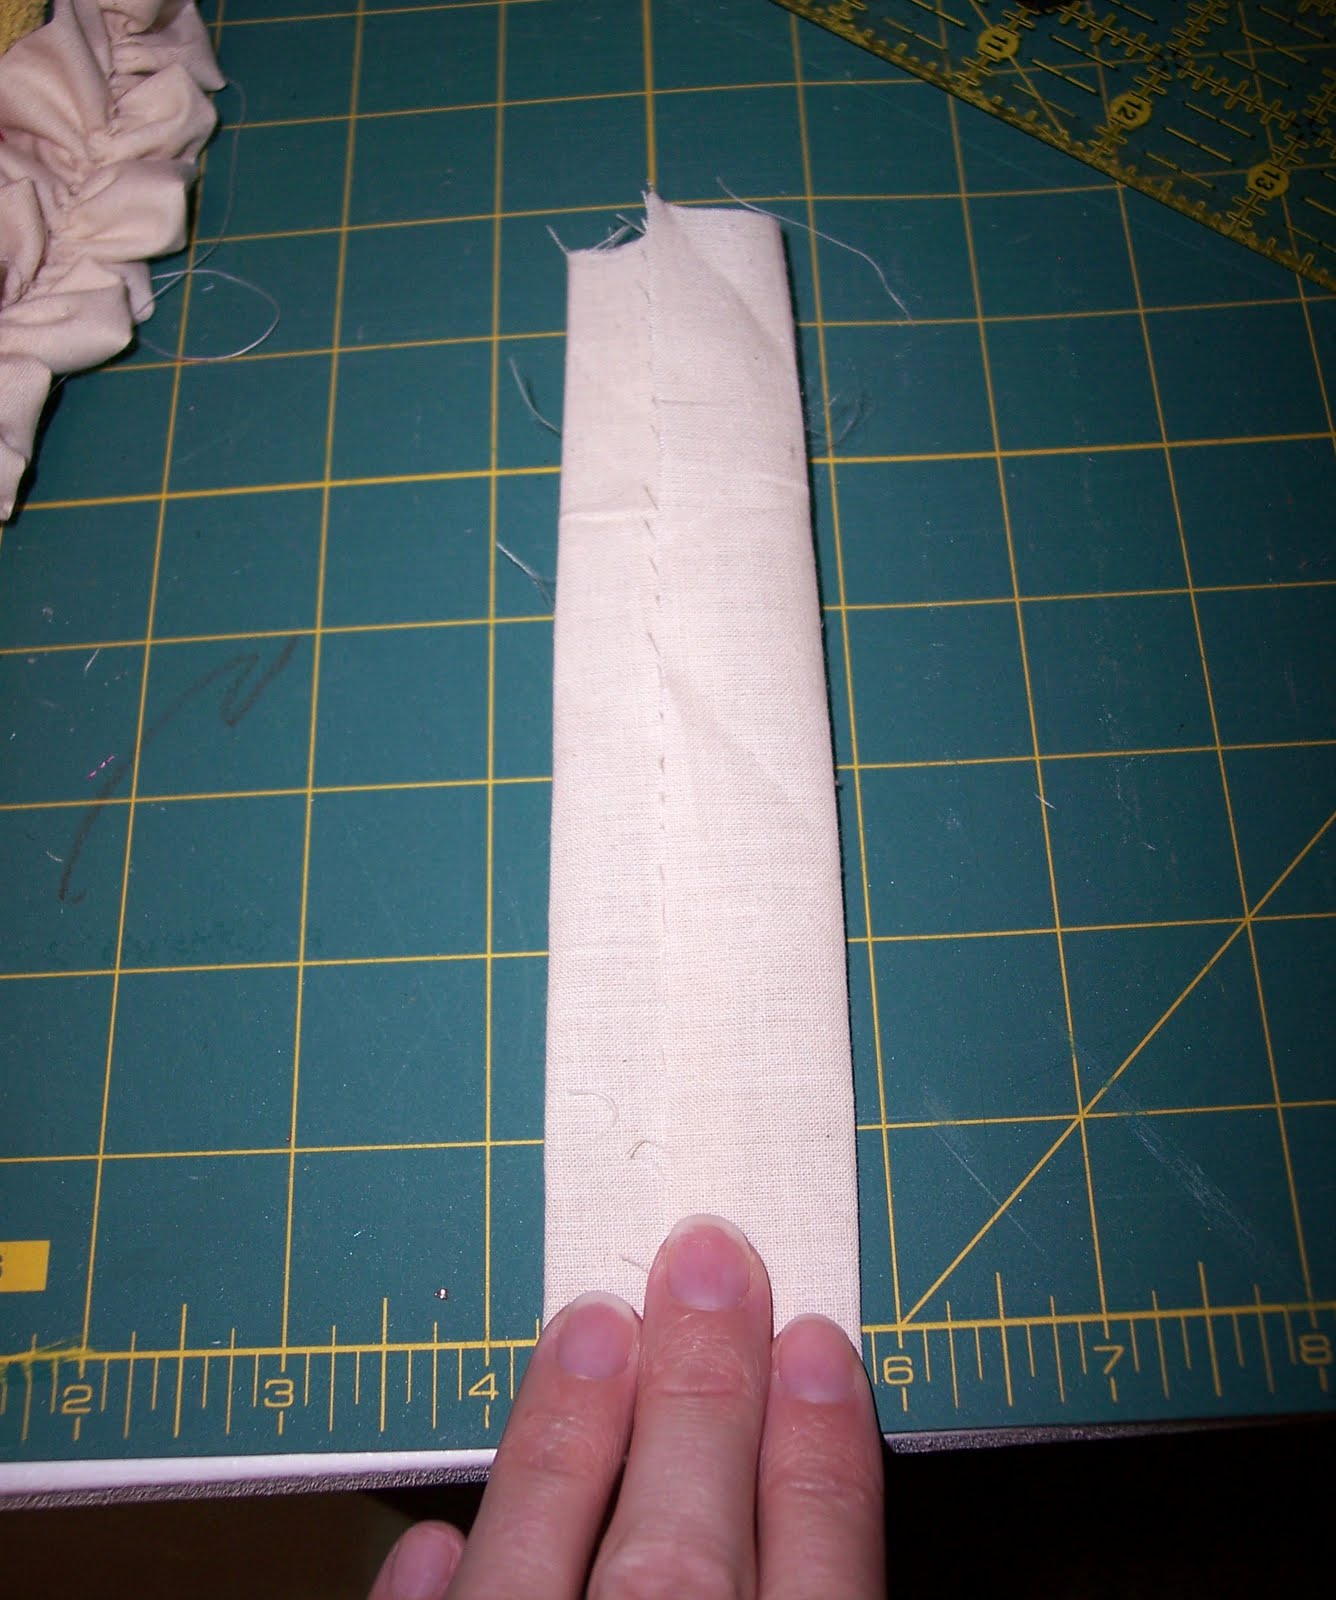 Now sew down the center using the longest stitch your machine will do. Make sure to go through all 3 layers!
Pull one thread on the end of your strip and gather the fabric. It doesn't have to be the perfect length.

STEP 4: Mark you runner top.
Layer your top, batting, and bottom as they will be when finished. Now mark the center of your runner on both edges of the runner. Make marks every 2.25". I used alternating colors of pen so that I'd know which marks went together. The marks will end up under the binding so don't worry about them.

STEP 5: Attach ruffles.
Carefully pin all of your ruffles onto your runner, going through all 3 layers of the runner.
Sew along the center of each ruffle.

Step 6: Add your binding.
You can do the binding any way you want to. This is how I did this runner:
Make a binding by sewing together enough 3" strips of fabric to go all the way around your runner. Iron the strip in half. Then fold each side in toward the center line and iron.
Folding the bias tape around the edges, pin it in place.
Zig-zag stitch around the binding, making sure to go through all the layers.

Enjoy!!! It's a simple, classy table runner.
PS. Linking up to some awesome parties...


22 comments:
I Love these ruffles!! I like how you have your sides binded? Bound? How do you say it...
Visiting from justsewsassy.com
LOVE the ruffles, thanks for the tut. Lezlee
So pretty! Here is my version of it
http://raggygirlvintage.blogspot.com/2010/06/white-ruffle-love.html
Tracey
Gorgeous!! I love this and saw something like it in a catalog but didn't want to pay the hefty price. Now I am thrilled to be able to make my own - thanks to you!! Great tutorial, can't wait to make mine. Have a fabulous week.
God Bless,
Kathleen
Thanks! Just what I've been looking for!
~Jamie
That is sooo pretty. :) Thanks so much for linking up! Adding your blog to my "favorite reads" blog list. :)
Love the ruffles! Great job!
How pretty!! I LOVE the ruffles!
Thanks for linking @Creative Itch's "Sew Cute Tuesday"!
Lovely.
Great tutorial also, so please do come and link it up at our site so our readers can find you also. They'll love this as much as I do
(ps this is a weekly linky for DIY CRAFT tutorials, so you can come back each Wednesday with some good creative instruction... :-)
http://www.finecraftguild.com/diy-tutorial-linky-party-9/
Looking forward to featuring you soon!
Rose
That is super cute. Good idea!
Found you at Sew Much Ado. And glad I did.
I am loving ruffles these days...you should shee the tee I made!
Great site...LOVE!
BTW...I'm your newest follower!!
You're welcome to come along, Dorian! Glad to have you here.
I like your monochromatic version. When I'm ready for a change I'll have to keep this in mind. Thakns for sharing.
LOVE ruffle anythng.. and I have never seen a cute runner like that! So darling :)
~ Emily N. from "too Blessed to Stress"
This is sooo adorable! So creative! I'm your newest follower and I'd love to invite you to my link party/giveaway at FrouFrouDecor every Friday! Hope to see you there!
~Terrell @ FFD~
That is a simple elegant table runner.I love it!
This is a very cute runner, thank you for sharing the tutorial!
this is such a great idea...it screams thanksgiving to me!@
This is very lovely! I really like it a lot! you could easily make this in different colors to work with different seasons too.
Thank you for linking up at www.simplydesigning.blogspot.com
Oh, this is so pretty, nice tutorial too!
Sew cute! I featured this on Hoo's got talent! Thanks for linking up to the party!
Post a Comment